One of the most appealing things about the Arduino and ATmega328 is their size and simplicity. After working with desktop and server computers for years I just loved how a small little chip could be programmed easily to achieve things that I cannot get a full blown computer to do. I have never been a computer programmer though, but I know they don’t interface with the ‘real’ world too easily.
If a 28 pin micro controller is good, wouldn’t an 8 pin micro be even better? Well, I started to research the ATtiny85 and discovered that it is almost as good as its big brother in some situations. But best of all, it can be programmed from the familiar Arduino IDE

As you can see from the pinout, the ATtiny has similar multifunction pins as the ATmega. Of course there are less of them, but you’ve still got digital IO, Analog in, PWM out as well as MISO, MOSI SCK. There is less memory, and it doesn’t run as fast (but uses inbuilt oscillator so wiring is simpler), and there is no UART for hardware serial. It is, however, ideal for a little project I have in mind… but more on that later

Because there are no serial pins it is not possible to program it directly from a PC. There are a couple of options though, such as a dedicated AVR programmer like the Dragon (as demonstrated by Matt Little in his blog), or using an Arduino as the programmer (as demonstrated on the High-Low Tech blog)
I went down the Arduino programmer route as it was free (I had all the bits already) and meant I could use the Arduino IDE for writing the sketches. I could give you a step by step instruction on how to do it, but as I just followed the High-Low Tech tutorial word for word I suggest you do too. (Note that the article was written for version 0022 of the IDE. If you are using 1.0 then they have an update here). In summary though, you will need to add a hardware file to the IDE which has all the ATtiny settings in it, load the ArduinoISP sketch on to the ATmega, and you will need to connect the ATtiny to the MISO, MOSI, SCK and RST pins of the ATmega. This turns the Arduino in to an ISP for programming the ATtiny.
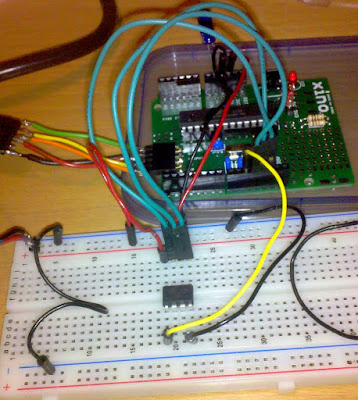
As you can see, I used a Xino from Ciseco to do the programming. If you can program an Arduino, you can program an ATtiny.
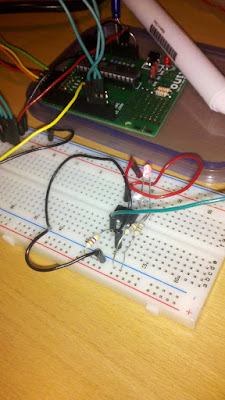
In no time at all I had the ‘Blinky’ sketch up and running. Yay Me!