If you have seen my previous blog entry, you’ll know I have been playing around with an ATtiny85 for an upcoming project (more on that later…). Using an Arduino (or, in my case a Xino from Ciseco) is easy enough, but when a sketch needs lots of tweaking to fine tune it, it means the ATtiny spends most of its time going in and out of the breadboard. So I decided to build a dedicated ATtiny programmer
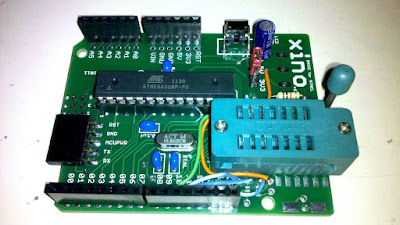
If you have read my previous blog entries you will know I am a big fan of the prototyping area on the top of the Xino boards. I’ve used them in the dice project and the Pachube temperature logger to great effect. For this project, all I needed to do was mount a ZIF socket, connect it up to the appropriate pins on the Xino and add a capacitor.
I wasn’t able to find any 8 pin ZIF sockets (not at a reasonable price anyway), but a 14 pin one was very cheap on eBay and fitted in snugly. It was easier to wire to the bottom 8 pins than the top 8 pins, and although I can easily see where the wires connect to, I’ve added a legend to the ZIF socket with a Sharpie so I don’t forget. The wiring is exactly the same as I did for the breadboard programmer. Have a look at the excellent tutorial on High-Low Tech for a reminder.
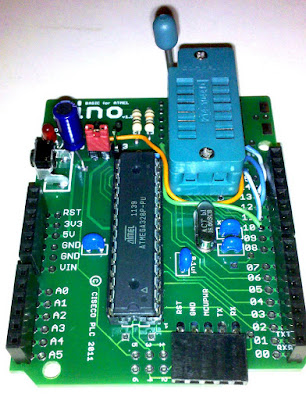
There wasn’t a neat way to get the 10uf capacitor between the Xino reset and ground, so I’ve cheated slightly by using a via, but it works just fine.
I’ve got a few things I want to do with the ATtiny micro, so I have left the ArduinoISP sketch loaded on the ATmega, which effectively turns it in to a dedicated ISP for under £10!