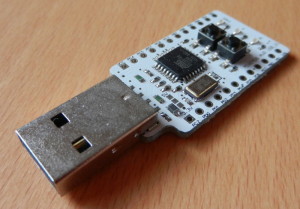
A little while back, Nottingham Hackspace got the opportunity to buy a bunch of Minimus V1 AVRs at a very good price. Not being one to turn down a bargain, I bought a few of these little critters to see what they can do.
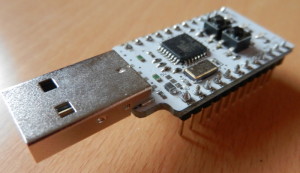
On paper, they look great. USB programmable micro running an Atmel chip similar to an Arduino (so possibly compatible with the Arduino IDE), in a package slightly bigger than your average USB stick but with a couple of buttons, LEDs and all the pins broken out.
It turns out that there’s a lot of misleading, conflicting, partial, out of date, or hard to follow info out there, not to mention that most of it is for the Minimus V2. I had the V1, so struggled to get it to do anything exiting at all for ages. After a very frustrating day of trying stuff, following dead links and generally wasting a lot of time, I got some joy with the Arduino IDE. To save you the hassle, read on for what worked for me.
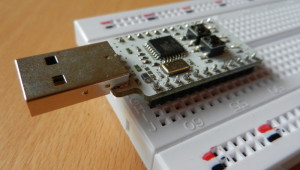
The first thing I did was to add some 0.1″ header pins
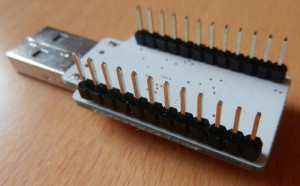
This means you can just plug it in to a breadboard to prototype your design.
Note that I can’t take the credit for getting the Minimus to work with the Arduino IDE. All I have done is trawl through Google links and to detail what worked with me and my set up. Note that I’m using Window 7 64 bit, but it should be similar for any Windows OS.
- Download Arduino IDE 1.0.3 from arduino.cc and extract to my Documents directory
- Download and install Teensyduino 1.11 from http://www.pjrc.com/
teensy/td_download.html (pointing it at the Arduino directory when prompted) - Download and install FLIP 3.4.7 from http://www.atmel.com/
tools/FLIP.aspx - Plug in a Minimus and you’ll see it’s an unrecognized device in device manager. Update driver, pointing it at C:\Program Files (x86)\Atmel\Flip 3.4.7\usb (and saying yes when prompted)
- In FLIP, go to Device > Select > AT90USB162
- In Arduino IDE, select Tools > Board >Teensy 1.0
- Write your sketch. I used the Blink sketch, changing it LED pin to 6 for red LED, or 5 for blue LED (note that high is off, and low is on for onboard LEDs)
- Click upload and it will compile then pop up with the Teensy program with button to ‘open HEX file’ Click this and drag it to desktop. Then cancel out of Teensy prog.
- Open Flip.
- Plug in Minimus.
- To put Minimus in programming mode, push reset, push HWB, release reset, release HWB (sounds complicated, but just roll your finger over the buttons!)
- Load the .hex file from desktop
- Select communication USB [open]
- Run the operations flow (erase, program, verify)
- Program the device
- Reset Minimus to put it back in to run mode
It is also worth mentioning that Bob Clough has a great pinout diagram on his site here
Have a look at the Minimus category on this site to see some of the projects I’ve been using the Minimus for.